the mac and cheese recipe you’ve always wanted

i am such a creature of habit. as soon as the weather starts to get cold, all i want to cook and eat is old comfort food classics. it’s only november and i’ve already made my chicken pot pies twice, plus there’s one waiting for a rainy day in my freezer. i start to stock up my cupboards with beans, pasta and baking staples as if there is a chance my local grocery store is going to close down and leave my pantry bare. it’s such odd behavior, but i do it every year. maybe i was a pioneer in another life and was forced to eat canned creamed corn all winter to survive. who knows. the good news about my loony antics is that i’ve made so many recipes so many times that all the kinks have been worked out for your benefit. so don’t judge, just eat!


macaroni and cheese (makes 8 to 10 servings)

1lb elbow macaroni, cooked just until al dente
1 stick butter
4 cloves garlic, pressed
1/3 cup flour
2 1/2 cups milk
2 1/2 cups half & half
1 cup grated sharp cheddar
1 cup grated gruyere
1 cup grated fontina
1/2 cup grated parmesan
1/4 teaspoon nutmeg
1 tablespoon kosher salt
2 teaspoons black pepper
2 tablespoons flat leaf parsley, chopped
1 tablespoon fresh thyme, chopped
2 egg yolks
1/2 cup panko breadcrumbs

preheat oven to 350 degrees.
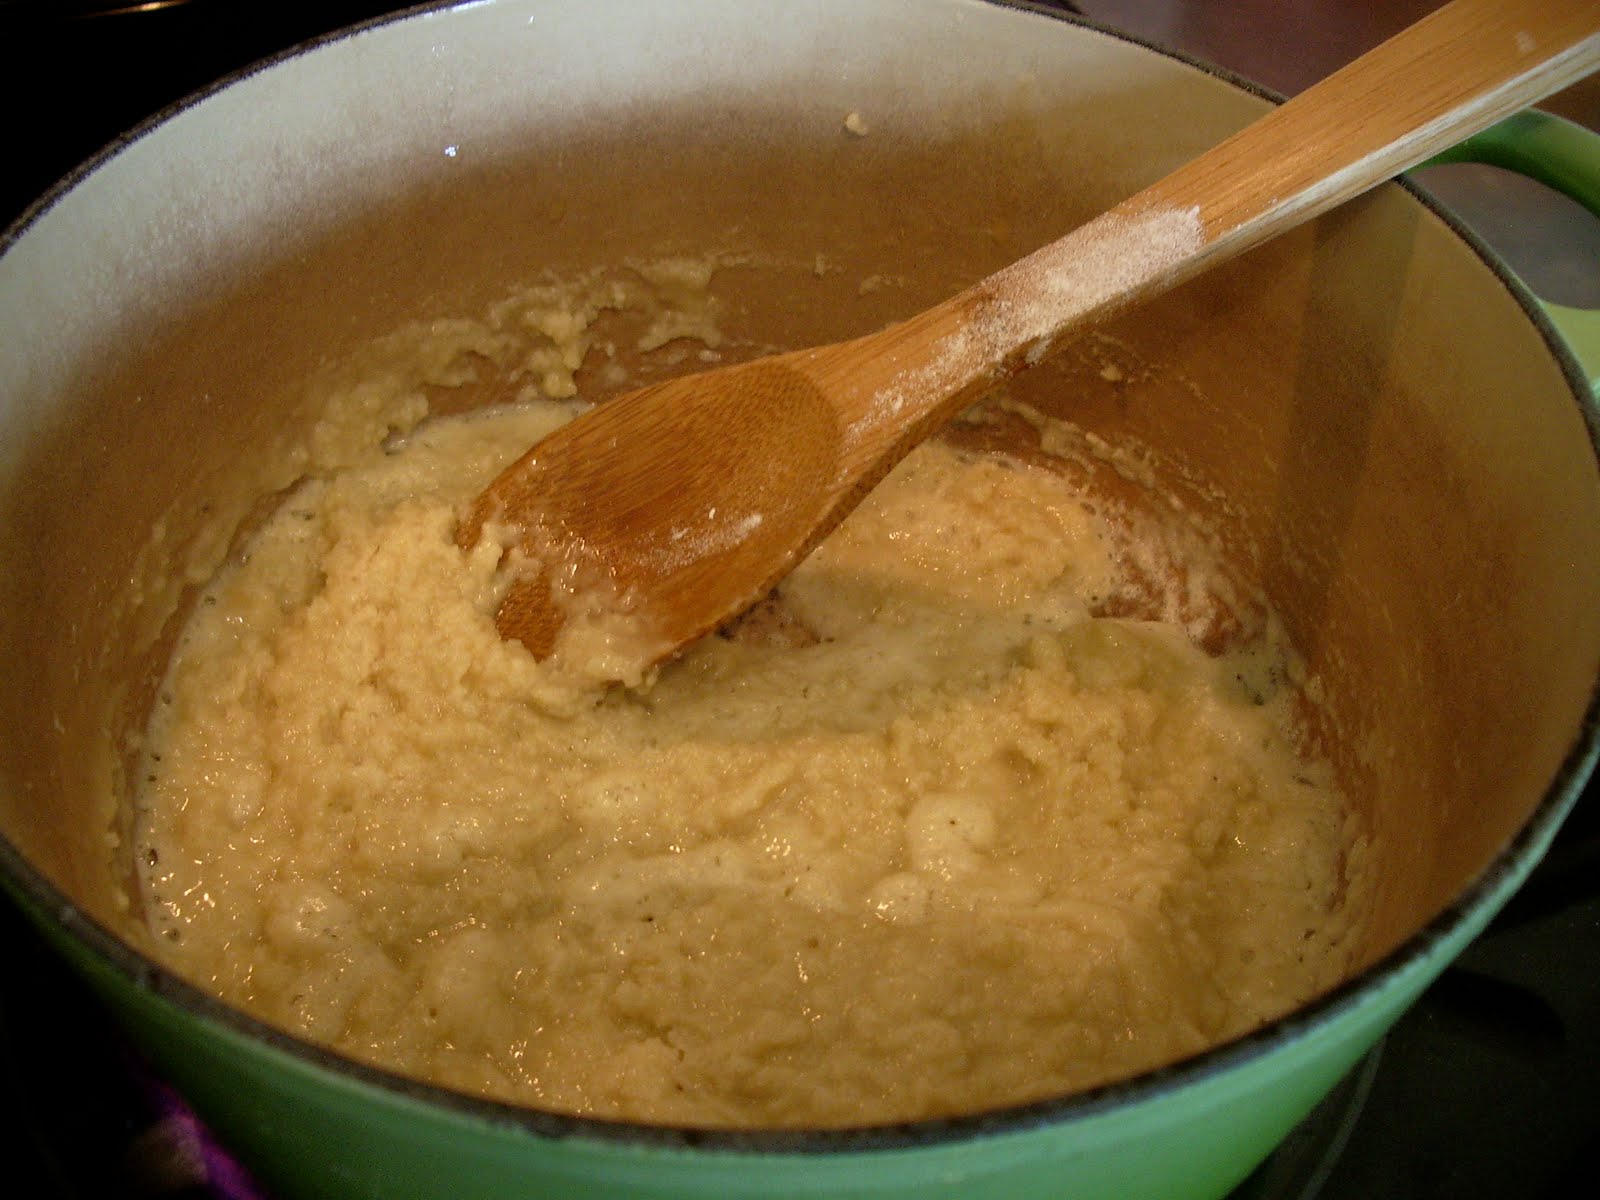
in a large sauce pan, melt the butter. add the pressed garlic and saute for just a minute. add the flour and cook until the roux is a light blond. heat the milk and half & half in the microwave and slowly whisk into the roux. add the salt and pepper. cook until the sauce is nice and thick, about 5 minutes. off the heat, add all the grated cheeses and stir until melted. pour the cheese sauce over the cooked pasta. stir in the egg yolks (temper them so they don’t scramble) and the chopped herbs. pour the mixture into a buttered 9×13 casserole dish and sprinkle with the breadcrumbs. bake for about 45 minutes or until the top is golden and the sauce is bubbling. let the mac and cheese rest for about 15 minutes before serving.

this recipe is easy and really quite delicious. the panko breadcrumbs make the perfect crunchy topping without competing with all the different cheeses. for a little variation you could add some crispy panchetta and trade the parmesan for some blue for a more “grown up” dish. cheese dishes don’t typically freeze well, but you could make this a day ahead and bake it off when you’re ready. happy eating!

Posted in cheese, pasta, recipes, side dishes | 2 Comments

the best chocolate chip cookies i’ve ever had

in an ongoing effort to save money to buy a house in seattle, my husband and i have been hosting potluck dinners every sunday with six of our close friends. we switch off making the main dish, side dish, and dessert. every couple also gets a week off of cooking and just brings the wine for the evening. we’re all huge madmen fans, so the dessert is usually consumed around the television while don draper makes us all swoon. (well, most of us anyway) it was erik’s turn for dessert this week and he made the most delicious chocolate chip cookies! he baked them at my house so i got to witness all the baking tricks. like i’ve mentioned before, i’m self-taught in the baking department, so learning new techniques is always appreciated. erik was kind enough to share his recipe and i made a batch yesterday so you can see all the steps and tricks. the dough stores wonderfully in the fridge so you can have fresh baked cookies whenever you’re in the mood. if you’re anything like my husband, that translates to right now!

chocolate chip cookies (makes 2 dozen large cookies)

2 cups plus 2 tablespoons of all purpose flour
1/2 teaspoon baking soda
1/2 teaspoon salt
12 tbsp. (stick and a half) butter, melted and cooled to just warm
1 cup firmly packed brown sugar (I use golden brown, but any will work)
1/2 cup granulated sugar
1 large egg plus 1 egg yolk
2 teaspoons vanilla extract
1/2 teaspoon cinnamon*
fresh grated nutmeg*
3/4 cup white chocolate chips*
3/4 cup milk chocolate chips

heat oven to 325 degrees and place one rack at the upper middle position and one at the lower middle. whisk together flour, baking powder, and salt in a bowl and set aside. combine melted butter and sugars by hand or in the bowl of an electric mixer and blend until well incorporated. beat in the egg, vanilla, cinnamon, and nutmeg. add the flour mixture 1/3 at a time until completely mixed. fold in the chocolate chips making sure their all through the dough. cover and refrigerate for at least one hour. you can keep the dough in the fridge over-night as well.
roll about 1/4 cup balls of dough with your hands and place on a parchment or silpat lined cookie sheet (or sprayed with non-stick spray) about 2 inches apart from each other. place cookie sheet in the oven on the lower rack and bake for 10 minutes. remove cookie sheet, turn so front is now back, and place on the upper rack. bake another 6 to 8 minutes, or until the cookies are slightly browned around the edges. (i started out on the middle rack and just turned my cookie sheet and they came out perfect) remove and let the cookies cool on the cookie sheet. don’t burn your mouth when you dig in.
*you can omit the cinnamon and nutmeg, but they are a wonderful addition to this cookie. if you’re not a white chocolate fan, by all means use all milk or semi-sweet chips.

i feel like now i can live out my fantasy of being the mom with the best chocolate chip cookie recipe… thanks erik. now i’ve just got to remember to always have gum in my purse and i’m all set!

Posted in desserts, recipes | 3 Comments

french macarons, oui oui!

i am sick of cupcakes! i make them for every occasion and i feel like they’ve “jumped the shark”. i know they’re adorable and delicious; especially my recipe, but i was looking for something a little more “grown up” to make for my friend corey’s birthday. he’s quite the trendsetter, so i needed something that would be the pastry equivalent of a prada shirt. i can’t afford to buy him a prada shirt nor would i feel comfortable picking out clothes for this man (he can dress me under the table). i started to search for recipes and came across pictures of french macarons. they were so beautiful and elegant and i knew i hit the jackpot. the recipes were pretty intimidating though. i’m completely self-taught when it comes to pastry so i’m not as confident going in as i am with culinary recipes. after a few tries, i think i came up with a solid recipe that i can proudly pass along to you. they are really fun to make too…

french macarons (makes about 60 cookies or 30 sandwiches)

basic macaron batter

2 cups powdered sugar
1 cup powdered almonds (about 4 ounces slivered blanched almonds, pulverized in a food processor)
4 large egg whites, at room temperature
1 cup granulated sugar

*2 1/2 tablespoons unsweetened dutch-process cocoa powder
*red food coloring
*yellow food coloring

chocolate ganache filling

1/4 cup heavy cream
2 teaspoons light corn syrup
4 ounces semisweet chocolate chips
1 tablespoon butter, cut into small pieces
*1 tablespoon raspberry extract

combine all the ingredients in a saucepan and heat on med-low until the chocolate is melted. set aside and let cool to room temperature. *(i divided my ganache into 2 bowls and added the raspberry extract to one).

preheat oven to 375 degrees

line two large baking sheets with parchment paper and have a pastry bag (or a gallon size freezer bag) with a medium sized plain tip ready. (standing the bag in a tall glass helps if you’re alone)

in a food processor, grind the almonds to a fine powder and then push the powder through a mesh strainer. (this step really makes a difference in the batter’s consistency)

in the bowl of a standing electric mixer, beat the egg whites until they begin to rise and hold their shape. While whipping, slowly add the granulated sugar and beat until very stiff and firm, about 2 minutes.
carefully fold the dry ingredients into the beaten egg whites with a flexible rubber spatula. When the mixture is just smooth and there are no streaks of egg white, stop folding and scrape the batter into the pastry bag. *(at this point, i divided the batter into 3 different bowls and gently folded in the cocoa powder into one bowl and the food colorings to the others).
pipe the batter on the parchment-lined baking sheets in one inch circles (about 1 tablespoon of batter) spaced one inch apart.
let the macarons sit for 20 minutes and then bake them for 12-15 minutes. (this step is really important if you want your macarons to have a nice flat top) let the pan cool completely on a rack and then remove the macarons from baking sheet.
spread a little of the ganache on one macaron and sandwich together. if you’re serving your macarons today, leave them out on a pretty plate. if you plan to serve them later, store them in an airtight container.

not all of my macarons came out perfect, but they all tasted fantastic. you can play around with different fillings and colors (a smear of raspberry or apricot jam would be lovely) and help me make these little confections the new cupcake!

Posted in desserts, recipes | 2 Comments

fowlproof roast chicken

when i first started cooking, roasting a chicken was always a daunting and terrifying task. i can’t tell you how many times my chicken looked perfect on the outside, but was a poster bird for salmonella on the inside. then there was the parade of over-cooked and dried out birds that even the most delectable gravy couldn’t salvage. looking back, i don’t understand what was so difficult about simply roasting a chicken. i promise, it’s not that hard. and i know we’ve all tried our hand at basting, brining, stuffing, trussing, and tenting, but i’m here to tell you that after a few easy steps, all you have to do is shut the oven door and come back in 90 minutes.


roast chicken

4 1/2 to 5 lb free range chicken
2 tablespoons butter, softened
2 tablespoons extra virgin olive oil
1 tablespoon salt
2 teaspoons freshly cracked black pepper
1 tablespoon fresh rosemary, finely chopped

the night before you are planning to serve your chicken, remove the giblet package and trim away any fat around the cavity. pat the skin dry with paper towels and place on a small cookie sheet with 2 inch sides that you have lined with heavy duty aluminum foil. (this makes clean up a breeze. just wait for the pan to cool and toss the foil) tuck the wings tips under the fatter part of the wing to prevent them from burning. mix together the butter and olive oil and brush all over the chicken. season the bird with the salt, pepper, and rosemary, making sure to season the cavity as well, and refrigerate, uncovered, overnight.

preheat oven to 375 degrees. take the chicken out of the fridge about an hour before you put it in the oven to get it up to room temperature. bake your bird for 90 minutes. remove it to a cutting board and let it rest for 20 minutes uncovered. carve and serve!
it really is that simple. no need to baste or truss or stuff the cavity with lemons and herbs. i’ve tried all the tricks and narrowed it down for you. the overnight stay in the fridge does wonders for the flavor of the meat and the skin. if you are new to carving, it’s easiest to remove the legs and wings first and then carve off each side of the breast. i hope if you were afraid of roasting a chicken that you’re not afraid anymore. it’s just chicken people!
Posted in meat dishes, poultry, recipes | 2 Comments

focaccia bread

my husband and i are house-hunting and getting more and more nervous about signing our life away on a little piece of property. we are waiting for our agent to get back to us about one house in particular so i thought i would kill some time and do a little baking. we are about to become very house-poor, so making everything from bread to soup from scratch will be a huge help to our hefty grocery bills. welcome to life on a budget. i will miss the careless days of renting and shopping, but we all have to grow up sometime i guess. at least we won’t be living on canned soup and wonder bread.

focaccia bread

1 envelope rapid-rising dry yeast
1 cup warm water
2 tablespoons sugar
3 1/2 to 5 cups flour
2 tablespoon kosher salt
1/4 cup olive oil (plus 2 tablespoons for later)
cornmeal, for dusting the pan
4 garlic cloves, minced
1/4 cup grated parmesan
freshly ground black pepper
2 tablespoons fresh rosemary, finely chopped

in the bowl of a standing mixer fitted with a dough hook, proof the yeast by combining it with the warm water and sugar, stirring gently to dissolve. let the yeast sit for about 3 minutes or until a foam appears. with the mixer on low, slowly add 1/2 the flour to the bowl. add 1 tablespoon kosher salt and 1/4 cup of olive oil. slowly start to add more flour until the dough forms itself into a ball and no longer sticks to the bowl. let the machine knead the dough for you for about 5 minutes. the dough should be smooth and elastic.
form the dough into a smooth ball and place in an oiled bowl, making sure to coat the whole ball with oil, cover with a clean kitchen towel and put in a warm place to rise. let the dough rise until it has doubled in size. (this will take about an hour but, depending on the weather and how warm your kitchen is, it could take up to 2 hours).

coat a large sheet pan with a little olive oil and dust it with the corn meal. turn your dough out onto a counter or board and roll and stretch it into the size of your sheet pan. place the dough in the sheet pan, cover it with a clean kitchen towel and let it rise again until it has reached the top of the sheet pan’s sides. (this will take about 1 hour).

preheat oven to 400 degrees.
mix together the remaining 2 tablespoons of olive oil with the garlic, rosemary and 1 tablespoon of kosher salt. spread this mixture all over the top of the dough then sprinkle with the parmesan cheese and black pepper. bake on the lowest rack of the oven for 20-30 minutes or until the bread is golden brown. let the bread cool in the pan on a rack.

if you have never tried your hand at baking bread, this is a wonderful recipe to start with. it uses ingredients that most of us have in our cupboards already, and you don’t need any special equipment to make it. this focaccia makes fantastic sandwiches, garlic bread, croutons, bruschetta and pizza bread. it makes such a large loaf, you can even freeze half for later. perfect when you’re on a budget because you just bought your first house and can’t afford toothpaste!

Posted in breads, recipes | 1 Comment

pulled pork bbq sandwiches


it was moving day and we enlisted the help of several of our dear friends to help us out. we were only moving to a bigger apartment in the same building, so hiring movers seemed like a waste of money. since helping your friends move is always an annoying task, i decided to make all of our helpers homemade pulled pork sandwiches. i figured this would thank them in a much more loving way than delivery pizza and a case of beer ever could. i think it did the trick. if you have never tried your hand at slow roast bbq, this recipe is for you. it’s simple, fairly inexpensive, and really feeds a crowd. oh, and you don’t even need a grill. but don’t worry, it’s the real deal. even the most die hard bbq fans will be licking their fingers and coming back for seconds…


bbq pulled pork with lemon cole slaw (serves 10)

5lb -7lb pork shoulder roast (also called  boston butt)

for the rub:

3 tablespoons brown sugar
3 tablespoons kosher salt
2 tablespoon chillie powder
1 tablespoon garlic powder
1 tablespoon paprika

combine all the ingredients and rub generously all over the pork shoulder (don’t be shy). wrap in plastic wrap and refrigerate over-night.
preheat your oven to 3oo degrees. place your pork shoulder on a baking sheet and bake for 6-8 hours. (you’ll know it’s ready when it starts to come apart with just the slightest tug of a fork) let your pork rest for 20 minutes (it’s been through a lot people!)

after the pork has rested, using 2 forks, pull the meat apart and mix with the bbq sauce.
for the bbq sauce:

2 tablespoons olive oil
1 onion, diced
3 gloves garlic, minced
2 cups ketchup
1/2 cup cider vinegar
1/4 cup dijon mustard
1 tablespoon liquid smoke
1 tablespoon worchester sauce
2 teaspoons chillie powder
salt and pepper to taste

heat the olive oil and saute the onion until it’s soft and translucent. add the garlic and saute for a few more minutes. add the rest of the ingredients and simmer until the flavors combine (about 30 minutes). check for seasoning. i always end up tweaking this recipe several times. a little more heat, a little more ketchup, etc. etc. keep the bbq sauce on a low simmer until you’re ready to use it. you could make this a day ahead as well and heat it just before serving.

for the coleslaw:

1 head napa cabbage, shredded
1/2 head purple cabbage
2 carrots, grated
1/4 cup mayo
1/4 cup sour cream
1 lemon, juiced
1 tablespoon celery seed
1 teaspoon kosher salt
1/2 teaspoon black pepper

whisk together the mayo, sour cream, lemon juice, celery seed and salt and pepper. keep the sauce in the refrigerator until you’re ready to serve. right before serving, pour over the cabbages and carrots. (don’t try to mix this ahead because it can get super soggy. you can make the sauce a day ahead though).

serve your sandwiches on soft, white rolls with a generous helping of coleslaw right on the bun. this recipe is a lot easier than it may appear to be at first glance. you can certainly cut out a step by buying your bbq sauce, but give it a try… it’s really a cinch. enjoy your new bbq knowledge and make a little extra rub. i have plans for the leftovers!
Posted in meat dishes, pork, recipes | 1 Comment

perfect pickles

summer is finally winding down and, if you’re anything like me, you’re looking for a way to preserve that sunny feeling and use all those veggies your friends keep dumping on you from their over-abundant gardens. pickling is the answer my friends! but you don’t need a complicated recipe and special, hard to find ingredients. my recipe couldn’t be simpler. you can use it to pickle cucumbers, carrots, peppers, onions, asparagus, green beans, and even garlic. the pickles will keep in your refrigerator for up to 3 months, so you can make summer last just a little longer. try serving pickled cucumber and carrot coins next to your favorite sandwich as an alternative to chips. their good for the taste buds and the waistline!

pickling liquid

1 cup rice wine vinegar (you can use white wine vinegar too, but rice wine has a milder and sweeter taste)
2 tablespoons kosher salt
2 tablespoons sugar

combine all the ingredients in a glass measuring cup or bowl and microwave for 45 seconds. make sure the salt and sugar are completely dissolved. cool down to room temperature. i made cucumber and carrot pickles. cut the veggies into 1/4 inch discs and cover with the pickling liquid in an airtight container. your pickles will be ready to eat in 2 days and will keep for up to 3 months.

you can add dried herbs to your pickling liquid if you want to pump up the flavor, but it’s great plain too. dried oregano, dried parsley, dried basil, and red pepper flakes are all great additions to this simple brew. add about a tablespoon of herbs before you microwave. if you are pickling beans or asparagus, keep them whole. for onions or peppers, cut into 1/4 inch strips. for garlic, just peel and keep the cloves whole. there is no need to blanch the veggies ahead. keep them raw and crispy!

i hope this simple recipe makes you a pickling fool and stretches out your summer just a little bit.

Posted in recipes, vegetables | 1 Comment

fried chicken

after a bit of a life imposed hiatus, i thought it only fitting to come back with a recipe that embodies summertime and would, hopefully, get me back in your good graces. please forgive my absence and let’s get cooking again! nothing says “it’s summer time” quite like a big plate of fried chicken. i’ve been making this recipe for some time now, but it took a lot of experimenting and testing different fried chicken theories to finally come up with a recipe that has all the fried chicken bases covered. what are the fried chicken bases you ask? they are… juiciness, crispiness, flavor, and crust to chicken ratio. they are all equally important and when you hit all four, it is fried chicken nirvana! go forth and fry!

fried chicken
makes 20 pieces

10 chicken drumsticks
10 chicken thighs
(i like to use dark meat for fried chicken. i find that it stays juicier and cooks a little faster. you can use breasts if you like, just cook 2 minutes longer)
1 cup kosher salt
2 quarts water
1 quart buttermilk
4 cups flour
1/4 cup garlic powder
1/4 cup onion powder
2 tablespoons paprika
1 tablespoon kosher salt
1 tablespoon black pepper
1 quart canola oil

start by combining the kosher salt and water in a container large enough to hold all the chicken pieces. let the salt dissolve, add the chicken, and allow to brine in the fridge over night. in the morning, pour out the salt water and cover the chicken with the buttermilk. (don’t rinse the chicken please! i promise the chicken won’t be salty.) put the chicken and buttermilk back in the fridge for the rest of the day (or at least 4 hours). let the chicken and buttermilk come to room temperature before you start breading and frying. (take it out of the fridge about an hour before you start heating your oil.) 

in a large heavy bottomed pot, start heating your oil to 375 degrees. use a frying/candy thermometer to keep an eye on the temperature. this is a really important step. frying is all about temperature! you can pick up one of these thermometers in the meat department of your grocery store for about 8 bucks. money well spent!
while your oil is heating (this will take about 15 minutes) combine the flour,garlic powder, onion powder, paprika, salt and pepper in a brown grocery bag. make sure the flour and spices are well mixed. take your chicken pieces out of the buttermilk and add them to the bag. shake well until the chicken is well coated.

to make life easier, cut the bag in half so you can get to your chicken pieces without covering your kitchen in flour! leave the chicken in the flour until your oil is heated.

when your oil has reached 375 degrees, lay your floured chicken out next to your frying station and start carefully lowering your coated chicken into the oil. (i use a spider for this step) fry 4 to 5 pieces of chicken at a time depending on the size of your pot. you don’t want to over-crowd your pan. the oil should go down to about 325-350 degrees. keep an eye on the temp and raise or lower the heat as needed.

fry your chicken for 13 minutes and remove to a wire rack placed on top of more brown grocery bags. the bags will absorb the oil and the chicken will stay nice and crispy. continue frying in batches until all the chicken is done. move chicken to a big platter and serve.

this recipe produces chicken that definitely covers all those important fried chicken bases. it’s best served hot or at room temperature. if you end up with left-overs, cool the chicken completely and store in the fridge. i’m a huge fan of cold fried chicken for breakfast. don’t knock it ’til you try it!

Posted in meat dishes, poultry, recipes | 3 Comments

salad daze

as the days get warmer, here in the great northwest, and summer seems like a real possibility instead of a made up season, i become a salad fanatic. but as you can probably gleam, if you’ve been following my blog at all, a handful of chopped romaine and some cucumbers just won’t cut it. lettuce has gone “haute couture” in the last few years. it’s like the “little black dress” of the salad begging for some delicious accessories. there are so many varieties and micro greens and baby lettuces to choose from that you can make quite a statement with your salad. and this salad does just that. it can be served as a wonderful lunch or as a starter to a great summer meal. i encourage you to search out interesting greens at your local farmer’s market and to experiment with flavors and textures. give it a toss!

micro greens with orange vinaigrette, blue cheese and candied walnuts
makes 4 servings

1/2 lb micro greens*, washed and dried
1/2 cup blue cheese, crumbled (i like point reyes or maytag)
1 cup walnuts
1/4 cup simple syrup (equal parts sugar and water, bring to a low boil just until the sugar dissolves)
for the vinaigrette:
1/4 cup freshly squeezed orange juice
1 tablespoon orange liqueur
2 teaspoons dijon mustard
1/2 teaspoon kosher salt
1/4 teaspoon freshly ground black pepper
1/2 cup extra virgin olive oil

preheat oven to 375 degrees. toss the walnuts together with the simple syrup and spread, in a single layer, on a non-stick baking sheet. bake until the sugar has dried out and the walnuts are crunchy. this will take about 15 minutes. don’t go too far though… nuts can burn fast. with a spatula, toss the walnuts on the baking sheet and allow to cool. to make the vinaigrette, combine the orange juice, orange liqueur, dijon and salt and pepper in a bowl. while whisking, slowly stream in the olive oil until the dressing is emulsified. combine the greens, candied walnuts and blue cheese in a large bowl and toss with the vinaigrette right before serving. divide onto 4 salad plates and enjoy.
you can make the candied walnuts ahead of time if you wish. once they are cool, store them in an airtight container in your cupboard. they keep for about 2 weeks and they make a great little snack as well. i often put them out with cheese and olives when i have friends over for cocktails. the dressing can also be made ahead and stored in the fridge for up to 3 weeks. just give it a good shake each time you use it.

*micro greens are readily available at your local farmer’s market and can sometimes be found at trader joe’s and whole foods. i used organic pea shoots for this salad.

Posted in salads, side dishes, vegetables | 1 Comment

bolognese sauce

my italian half has taken over and it won’t be satisfied until i feed it a slow simmered bolognese sauce. my version allows you to go about your day, free as a bird, because you won’t be standing over a simmering pot for hours. you know that dutch oven that’s been sitting in your cabinet for years? you know the one, it’s fancy and french (le creuset anyone?) and comes in the most amazing colors and you never use it. well dust it off and put it to work. we have meat sauce to make…

bolognese sauce

makes 8 servings
1/4 cup olive oil
2 lbs pork shoulder, cut into 2 inch cubes (ask your butcher if he has country spareribs)
2 celery stalks
2 large carrots
1 onion
8 cloves garlic, minced
1 tablespoon dried basil
1 tablespoon dried oregano
1 cup red wine (if you wouldn’t drink it, don’t put it in your sauce)
28 oz can whole plum tomatoes (put them in a bowl and squish them by hand)
6 oz can tomato paste
salt and pepper
preheat oven to 250 degrees.
grind the cubed pork in a food processor. in a large dutch oven, or other oven-safe pot, heat the olive oil and saute the ground pork until browned. use your food processor again to chop up the celery, carrots and onions. add the vegetables to the browned pork, season well with salt and pepper, and cook on med/high heat until softened. this will take about 10 minutes. add the garlic, basil and oregano and cook for another 5 minutes. add the red wine and cook until all the liquid has evaporated. add the squished tomatoes and tomato paste and stir until well combined.
cover your pot and put it in the oven. i like to let mine simmer away in the oven for at least 4 hours. the longer the better! once the sauce has been simmered, check for seasoning and add more salt and pepper, if necessary.
i serve my bolognese over pappardelle noodles, but you can use whatever pasta you like. the sauce tastes even better the next day, so plan to willingly eat leftovers! your leftover bolognese also makes a great pizza sauce or serve it next to creamy polenta. mangia!
Posted in meat dishes, pasta | 4 Comments