breakfast fried rice

88D104B8-1181-4C48-B493-75E10DEE05EEone of the most valuable things we can do as home chefs is to think beyond the meal that we are cooking at the moment. doing a little prep for future meals goes a long way to stave off the dreaded “cooking fatigue” that we are all too familiar with in these stress filled times. as a working chef, my family usually goes out for dinner at least once a week and i’m at work at least two evenings, so i’m not cooking more than 4 times per week. now i’m cooking, what seems like, a hundred meals a day and trying to do it with variety and grace, but failing miserably most of the time. i never thought i would get sick of roast chicken or the myriad of dishes you can make from the leftovers, but i am. 

by the time the weekend comes along, a warm breakfast/brunch seems necessary after all the cereal and yogurt we’ve consumed, but actually cooking it is another story. a horror story. but we can do it, home chefs! we just need a little head start and a strong cup of coffee. to give yourself that much needed helping hand for your next sunday morning meal, consider ordering or making extra rice the next time you order chinese or make a stir fry. it will keep in the fridge for days and be there for you when you need an easy start to this breakfast fried rice. you can’t make fried rice with fresh rice. don’t try to argue the point. you just can’t. having some cooked rice in the fridge opens the door to any fried rice dish you’d like to try as well as rice pudding, or chicken rice soup. it’s a handy little meal starter when you’re staring down another long week of cooking. wine helps too!

breakfast fried rice (makes 4 servings)

  • 4 bacon slices, cut into 1/4 inch pieces
  • 3 tablespoons canola oil, divided
  • 1 yellow onion, diced 
  • 3 garlic cloves, finely chopped
  • 4 cups cooked white rice, chilled
  • 4 scallions, thinly sliced, divided
  • 3 large eggs, lightly beaten
  • 2 tablespoons fish sauce
  • 1 tablespoon fresh lime juice
  • 2 tablespoons soy sauce

4F565717-1EC5-4DB5-A696-0B8C37D4D481303803B6-C263-495E-9231-B2A2850DD7DD9C14CC76-326F-4F02-B91A-D3FA03DB0BE719077048-4F93-4AB4-B91A-77DC0AC10A95

heat a large nonstick skillet over medium heat. add bacon, and cook, stirring occasionally, until crisp, 10 to 15 minutes. remove bacon from skillet and drain on a paper towel. save bacon drippings from the skillet for another cooking adventure.

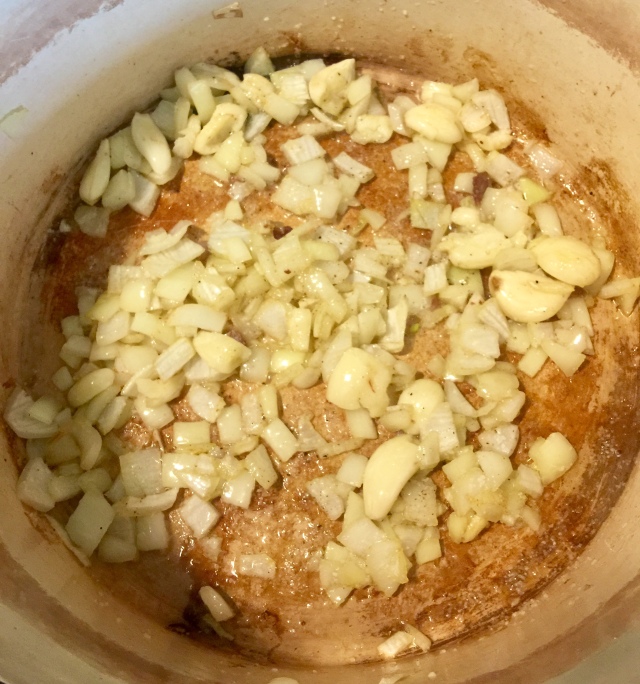
 add 1 tablespoon canola oil to skillet and return heat to medium. add onion and cook, stirring often, until tender and browned, about 10 minutes. transfer the onion to the plate with the bacon.

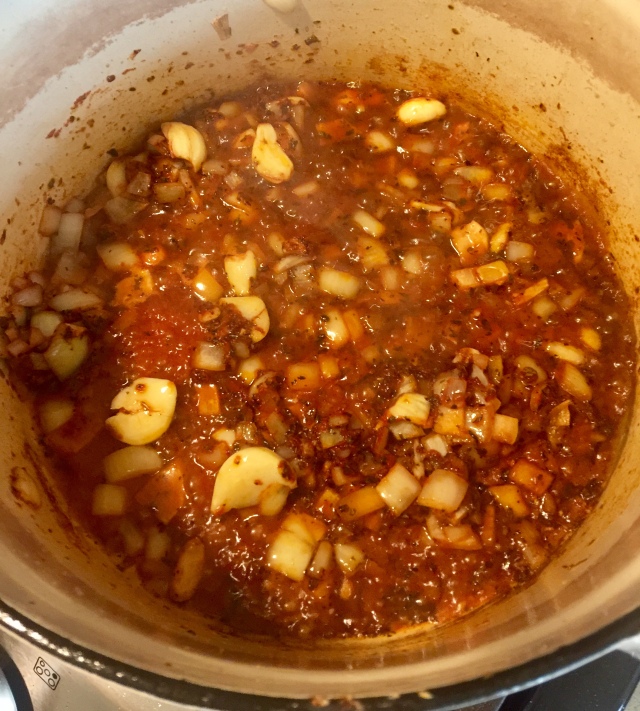
 add remaining 2 tablespoons canola oil to skillet and heat over medium high. add garlic and cook, stirring constantly, until fragrant, about 15 seconds. add cooked rice and 3 sliced scallions and toss to coat. cook, stirring occasionally, until rice is golden, about 4 minutes.

add bacon and cooked onions and toss to combine. stir in fish sauce, lime juice and soy sauce. 

turndown heat to low and add beaten eggs to skillet. cook, stirring and tossing until eggs are soft set, about 1 minute. take off heat and sprinkle with the remaining sliced scallion. enjoy!

88D104B8-1181-4C48-B493-75E10DEE05EEDFC905BE-70C5-48EA-8728-3B9A5297B075

Posted in meat dishes, pork, recipes, Uncategorized | Leave a comment

meatballs and red sauce

5693B55C-9C78-4520-9345-E8C454B0D693

as a little girl, i spent most of my time in the kitchen watching my italian nana cook. she made a delicious red sauce that i’m still chasing to this day. culinary school taught me all the nuances of sauce making and flavor coaxing and when i applied those techniques to my memories of my nana’s sauce, a new “sunday gravy” of my own was born. one of the biggest mistakes that cooks make with red sauce is rushing the early steps and not cooking it long enough. sautéing the dried basil is paramount to releasing the aromatic oils trapped inside. and, to that point, sautéing the tomato paste until a beautiful deep red emerges and creates a savory base for your sauce to grow from cannot be rushed. i like to use red wine vinegar, instead of red wine, to cut right to the acid bang. a wonderful thing happens when acid rich tomatoes pair with vinegar. the two acids both intensify each other and mellow each other out. i can’t explain it any better than that. science! cooking the sauce low and slow in a dutch oven is my preferred method. you can simmer it on the stovetop, but putting it in the oven keeps the temperature nice and even and you can just forget about it.

as for the meatballs, i know that a meat mixture of pork, beef, and veal is the classic combo, but i implore you to try ground turkey thighs instead. it has the perfect fat to muscle fiber ratio and ends up tasting just like the classic mix. it has to be turkey thighs. chicken thighs are not fatty enough. also, don’t try to mix in white meat to make things “healthier”. your meatballs will end up dry and disappointing. nobody needs to be disappointed by a meatball, we have the daily news for that!

meatballs in red sauce (serves 4 to 6)

for meatballs…

  • 1 pound ground turkey thighs (do not use white meat turkey)
  • 1/3 cup plain panko bread crumbs
  • 1/4 cup milk
  • 1 egg, lightly beaten
  • 5 large garlic cloves, grated
  • 1 teaspoon dried basil
  • 1 teaspoon dried oregano
  • 1 1/2 teaspoons kosher salt
  • 1/2 teaspoon pepper
  • 1/2 cup parmesan cheese, grated

for sauce…

  • 1/4 cup olive oil
  • 1 small onion, diced
  • 5 cloves garlic, chopped
  • 1 tablespoon dried basil
  • 1 1/2 teaspoons kosher salt
  • 1/2 teaspoon pepper
  • 1/4 cup red wine vinegar 
  • 2 tablespoons tomato paste 
  • 1 carton strained tomatoes (I prefer Pomi)

2E6A1DBF-DC1C-4D3D-ADC4-0AB59E4B75858C5BC7B4-0BAA-419B-811D-9E6BB938FD28CEC8FE9D-DB56-4FE1-ABA3-D945307CD144F734AA3C-5B9F-4D35-B647-9079606FED91078D2BF3-42C8-45A4-9643-D23474BC6AF9E81DBEC1-4A1A-4B62-83A7-E01E388847DF9B63BC49-A464-44E5-9BD7-8FD8CE440A26

Preheat oven to 375.

for meatballs, place panko crumbs in a large bowl and stir in the milk.

when the crumbs have absorbed all the milk and it looks like a paste, blend together with the eggs, grated garlic, basil, oregano, salt, pepper and parmesan.

add meat to bread crumb mixture and combine well with a fork. 

form into 12 even balls and place on a parchment covered rimmed baking sheet.

bake for 25 minutes, until slightly browned and firm to the touch.

while the meatballs are baking, make the sauce.

in a 3 quart dutch oven, sauté the onion in the olive oil until soft, but not browned.

add the chopped garlic, basil and salt and pepper and sauté for another 3 minutes.

add the red wine vinegar and cook until most of the liquid is cooked off, about 4 minutes.

add the tomato paste and sauté until deep red and aromatic, about 4 minutes more. 

add the strained tomatoes and bring up to a bubble. 

turn off the heat and add the cooked meatballs to the sauce. 

cover the pot and let the meatballs simmer in the sauce tucked in a 250 degree oven for around 3 hours.

serve with spaghetti, cooked until al dente and tossed lovingly in the sauce with the meatballs served on the side or on top.

Posted in all recipes, italian, meat dishes, pasta, recipes, Uncategorized | Leave a comment

cherry slab pie

AAC4ACC2-B62E-4C9A-ADB9-F25E335ED1E8
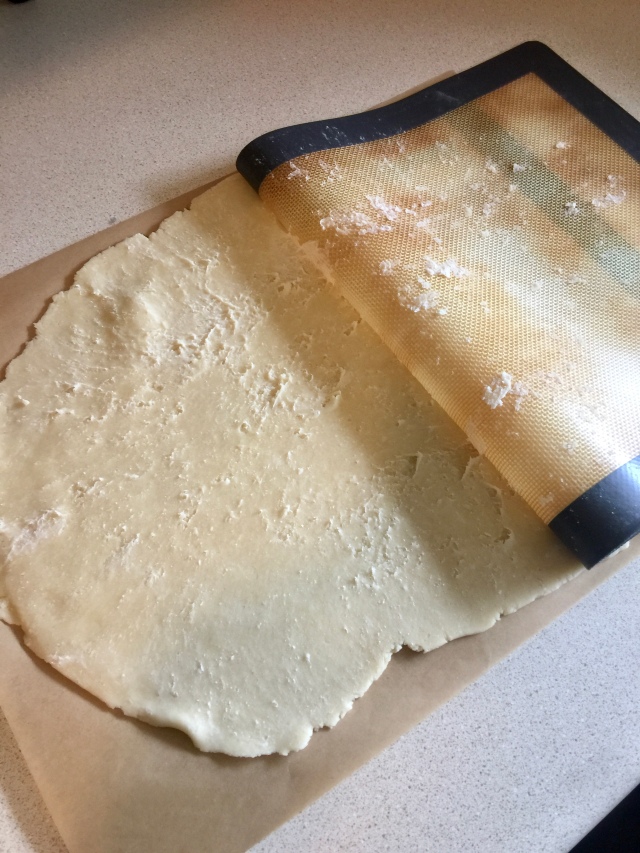
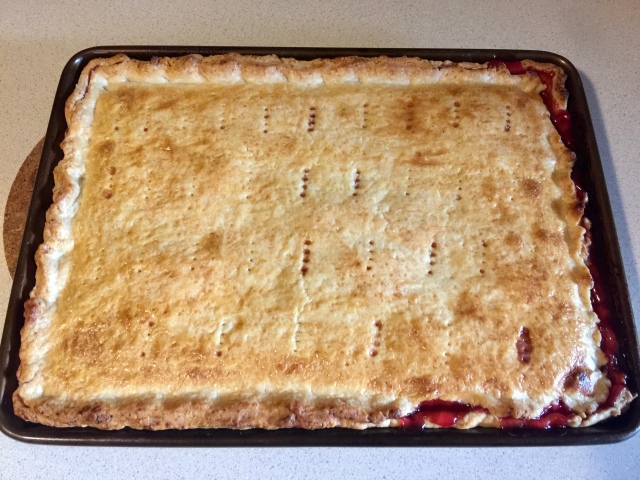
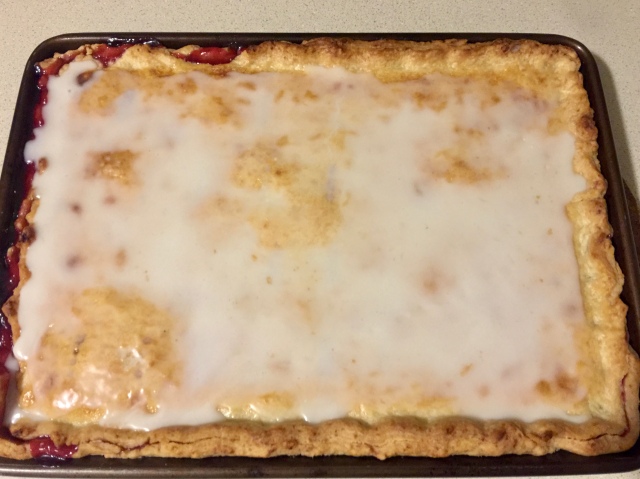
i think it’s come to that time in our quarantined lives to start eating pie for dinner, don’t you? but giving in to the dessert as a meal ideology doesn’t have to come with antiquated techniques and  arduous steps. i had been making pie crust dough the same way for years; make the dough, wrap the dough, refrigerate the dough, and then roll out very cold, hard dough as it crumbles and makes me throw said dough out the window. these days, i roll my dough between two pieces of parchment and THEN refrigerate the rolled out sheets to firm up in order to created that flaky crust we all strive for. this rolling technique, coupled with using lard in my dough, are my two biggest secrets and here i am just giving them away! you can use my crust recipe to make a traditional round pie as well, but i’m partial to slab pies. they are easier to cut and they hold up beautifully if left in the pan to enjoy leftovers for days. we are big cherry fans over here, but this pie works well with blueberries or apples. don’t make me regret my generosity. make more pie!

cherry slab pie (makes one quarter sheet pan pie)

  • 6 cups pitted sour cherries, defrosted and drained
  • 1 cup sugar
  • 1/4 cup cornstarch
  • 2 teaspoons vanilla
  • 1/2 teaspoon salt
  • 1 pie crust recipe *recipe below
  • 2 tablespoons heavy cream
  • 1 cup sifted powdered sugar
  • 1 tablespoon lemon juice
  • 1 to 2 tablespoons milk

pie crust (makes a top and bottom crust)

  • 4 cups flour
    2  teaspoons kosher salt
  • 2 teaspoons sugar 
  • 2 sticks unsalted butter, cold and dices
  • 1/2 cup leaf lard, cold (rendered pork fat linked above)
  • 6-12 tablespoons ice water

4349D131-7002-4B75-935C-46FF94B2D522A6967882-B547-46E1-9A55-E8D59C7681D937324F69-39ED-443D-9A90-6F8759FE61310268464B-2571-4515-9789-28A892DA7682334EB311-194A-4800-9BA7-0021C417F6F46E7B62AF-80ED-4B12-9926-96BEA77C53D9C31A23EE-BA81-4AB3-AFD2-891F4457CE6F5C56772B-21E1-4990-9464-13E581560023

place the flour, salt, and sugar in the bowl of a food processor, and process for a few seconds to combine. add the butter and lard and process until the mixture resembles coarse meal, about 10 seconds. with the machine running, add the ice water slowly through the feed tube, just until the dough holds together. Do not process for more than 30 seconds.

Turn the dough out onto a work surface. Divide in two with one piece slightly larger than the other. At this point, you can roll each crust between pieces of parchment, into a 1/4 inch thick rectangle and refrigerate until firm. If using later, you can wrap the unrolled dough in plastic wrap and refrigerate it until you’re ready to use. 

Preheat oven to 375 degrees. In a large bowl, combine cherries, sugar, cornstarch, lemon juice, and salt. Stir to combine; set aside.

Transfer to a quarter sheet rimmed baking sheet, (pastry will hang over sides of pan). Pour cherry mixture into lined baking sheet; set aside.

Drape the other rolled out crust over filling. Bring bottom pastry up and over top pastry. Pinch edges to seal. Using a fork, prick top crust all over. Brush with the heavy cream.

Bake until crust is golden and filling is bubbling, 40 to 55 minutes. Cool pie in the pan until it reaches room temperature.

In a medium bowl, stir together powdered sugar, lemon juice and milk until desired glaze consistency is achieved. Use a spoon to drizzle over top. 

1FF92527-A655-4B37-B60B-F3F96B8825F81F41ADEB-7DAD-41F0-A9DB-3B5E335DC2EAA00991C0-E08A-45B6-9E88-B2368C11D3C4

Posted in all recipes, desserts, Uncategorized | 2 Comments

cheeseburger and fries, when you need your fix!

C34B6631-8D77-4F7C-9746-6A686740F76A
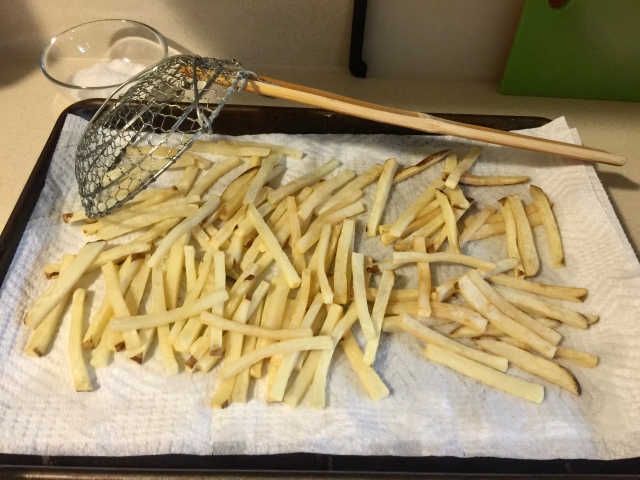
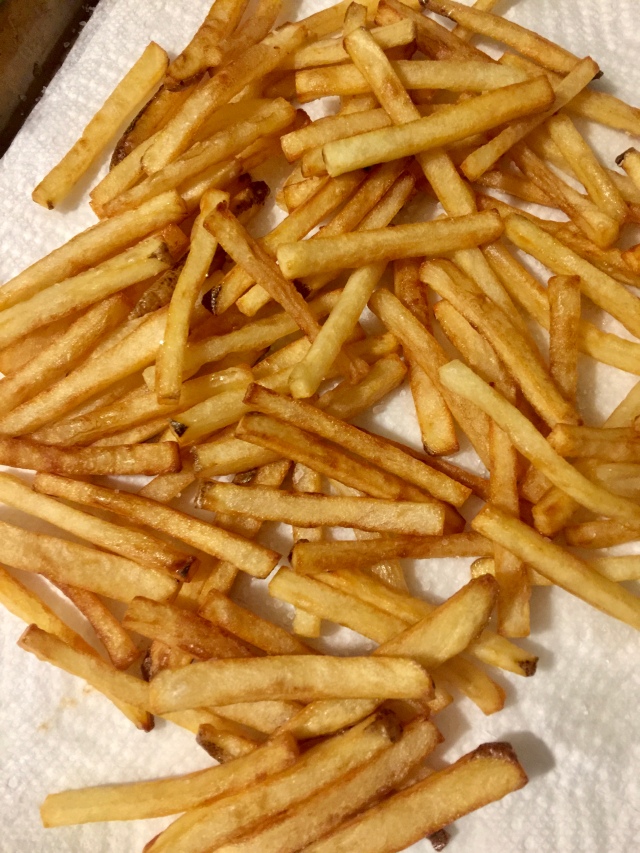
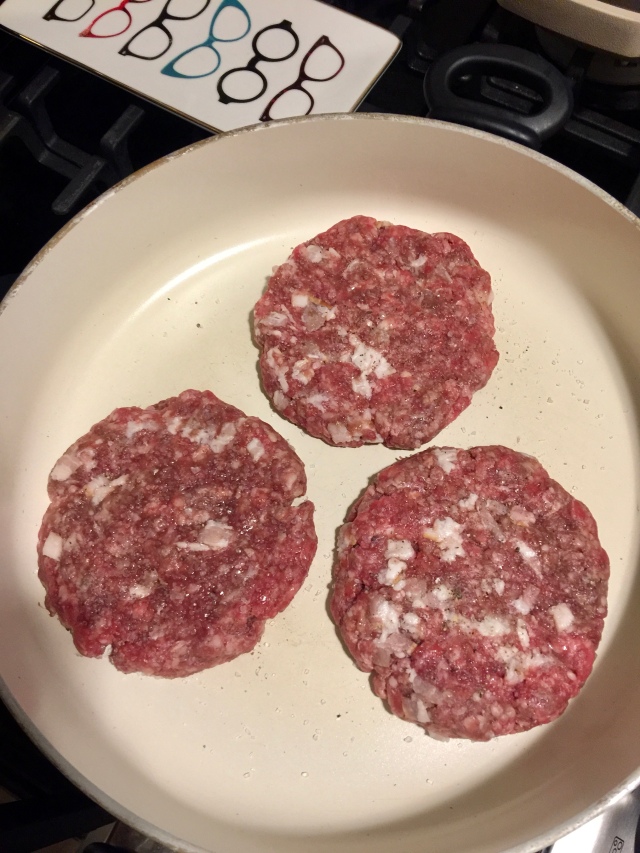
so, here we are in week one million of our stay at home quarantine. my dreams have all begun to feature food as the protagonist and me and my family as the captive victims in desperate need of table service and fancy cocktails. as a cooking instructor, i pride myself in my ability to rise to a food challenge, but the daily grind of cooking 3 meals a day, every day, has me ready to run for the hills! of course, in my dreams, those hills are sesame seed buns surrounded by molten cheese rivers. my family and i love to go to our neighborhood pub for cheeseburgers and fries, so this week i brought the pub to us.
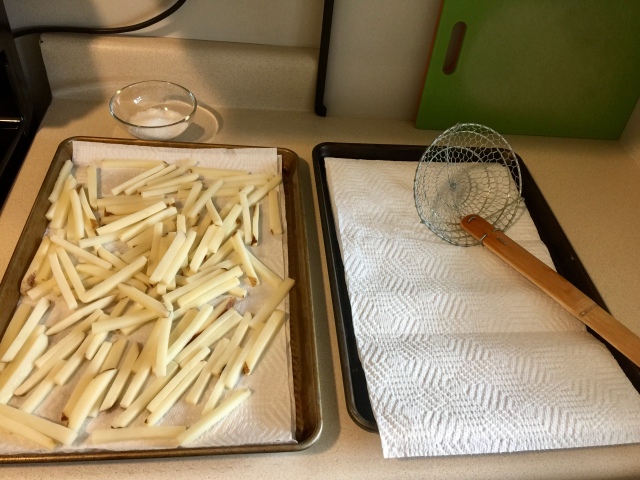
when making burgers at home, resist the urge to create a “burger mix” with your meat. you’re not making meatloaf people! keep it nice and simple, using the best meat you can get your hands on. i use organic grass fed ground beef and dice up raw bacon to add to each patty. this adds just the right amount of fat to the lean beef and an intoxicating aroma while the patties are sizzling in my skillet. for the fries, stick to good old fashioned russets. cut them into sticks and soak them in ice water for a couple of hours before you’re ready to fry. this will release some of the starch and help to create that crispy perfection you are craving. i am partial to american cheese on my cheeseburgers for it’s melty awesomeness, but i’m not here to fight. if you want to use cheddar or gruyere, just know that you’re 100% wrong, but it’s your burger and i can’t see you. or can i?

cheeseburgers and fries (serves 4)

  • 1 lb ground beef (85% lean)
  • 4 strips uncooked thick cut bacon
  • kosher salt and pepper to taste
  • 4 slices american cheese (deli style please, not the stuff individually wrapped)
  • 4 sesame seed brioche buns or potato buns
  • 4 large russet potatoes, scrubbed and dried
  • rice bran oil for frying (i prefer a deep skillet with 3 inches of oil)

0A59CF6C-CE30-4622-B3D6-A5ED5E790C94AB9F71D7-693B-41F0-9D79-253BD2B87738907091FF-23AE-476F-ABAE-6F02EE9E97F405EC8CF7-C6BB-4A41-A9FC-B414AA8C798FC34734B3-FA9E-4F8D-8B07-F63816D5F3B1821474A2-10B0-415F-BDAF-3CDCFB9B286C

for the fries…

cut each potato lengthwise into 1/4-inch-thick disks, then cut these disks lengthwise into 1/4-inch-thick sticks. 

soak the potato sticks in cold water for 1 to 2 hours. Drain and rinse the potatoes sticks and let the potatoes dry in a single layer on a towel-lined baking sheet.

meanwhile, heat the oil in deep skillet over medium heat until it reaches 350°F on a deep-fry thermometer.

blot the potatoes completely dry with more towels. gently drop one-half of the potatoes into the oil and increase the heat to medium high to maintain the oil temperature.  cook, stirring occasionally with a skimmer or a large slotted spoon, until the potatoes soften (you should be able to cut them with the side of the spoon) and are slightly blistered and creamier in color (remove them if they start to brown), 2 to 3 minutes.

scoop out the potatoes, shaking them to drain off excess oil, and transfer to a baking sheet lined with paper towels, arranging them in a single layer. fry the remaining batch of potatoes in the same manner, letting the oil return to 330°F.

now that all the fries are blanched, heat the oil until it reaches 375°F. add one-half of the fries and cook, stirring, until they turn golden-brown and become crisp (to test, carefully drain one on paper towels and try it), 1 to 2 minutes. transfer the fries to a baking sheet lined with fresh paper towels and sprinkle generously with salt. fry the remaining batch of fries in the same manner, letting the oil return to 360°F.

for the burgers…

divide the ground meat into 4 equal patties. add one strip of chopped bacon to each of the patties and mix it through with your hands until it’s evenly distributed. season the patties on both sides generously with salt and pepper.

in a skillet over medium heat, cook the burgers, turning often until a nice crust forms on the outside and they are medium rare to medium, registering 125-130 on an instant read thermometer. turn the heat off, drape the cheese slices over each burger and let the burgers rest while the cheese melts. serve on the buns of your choice with a little garlic aioli and pickles, or however you enjoy your cheeseburgers!

Posted in beef, meat dishes, side dishes, Uncategorized | Leave a comment

pork ragu, big batch cooking for the new normal

39AD8D2D-DF35-47C2-BE14-8B621839B6A3

3 weeks ago, the world turned upside down. with all of us navigating our individual quarantine situations, i thought i’d start posting here again and focus on big batch cooking and cooking projects that take some time. lord knows we all have some time on our hands! as a cooking instructor, my classes tend to focus on cooking from start to finish in a 2 1/2 hour time frame. these days, my job is on hold and i’m finding myself “project cooking”. my refrigerator is filled with deli-style containers filled with diced mirepoix, grated cheese, minced garlic and ginger etc. with these little “dinner starters” already in the fridge, making a meal is not as daunting as it would be if i had to start from scratch every night. it also frees up the other members of my family to try a new recipe since they basically have a sous chef living in the fridge. throw on an audio book and rip through some food prep to make this bizarre situation we are all living in feel less oppressive. next night’s dinner will be a breeze! 

for this recipe, i had a 5 lb, bone-in pork shoulder roast. i cut it in half and removed the bone. now, i have a pork bone in the freezer that would be a perfect base for split pea or lentil soup and another 2 1/2 lb pork shoulder to use for another big batch recipe. i served my pork ragu with creamy polenta for one night’s dinner, and with pasta and lots of grated parmesan for another dinner. you can use this technique with a chuck roast or even a whole chicken. making 2 different dinners from one protein is a great way to get creative and try some new recipes, but it also prevents your family from getting the “leftover blues”, which can come from eating the same thing for several days. it’s a real thing!  

pork ragu (makes enough for 2 separate meals for 4 people) 

  • 2 1/2 lb pork shoulder roast, cut into 2 inch cubes 
  • 3 tablespoons olive oil
  • 1 yellow onion, small dice 
  • 6 cloves garlic, peeled and smashed 
  • 2 tablespoons tomato paste 
  • 1/4 cup red wine vinegar 
  • 2 teaspoons dried basil 
  • 2 teaspoons dried thyme 
  • 4 bay leaves
  • 1-28oz can whole italian tomatoes 
  • kosher salt and pepper to taste 

5FE6DFCE-651F-4BCE-97A2-F7CFE998B1E37B309E67-8F6F-4399-BBDE-76DD030DFA4262B83704-A229-4C3F-A35F-DD9E5885F13E

  • preheat oven to 325. season pork generously with salt and pepper. heat oil in a large dutch oven over medium heat. cook pork, turning often, until evenly browned. remove pork to a plate.
  • add the onion and garlic to the pot with all the pork drippings and season with salt and pepper. cook, stirring occasionally, until the onion and garlic start to get soft, about 5 minutes. add the tomato paste and cook until it darkens slightly, about 5 more minutes.
  • add the vinegar and cook, scraping up any browned bits, until reduced by about half. now add all the dried herbs and continue cooking until most of the liquid is gone.
  • add the whole tomatoes with all their juices, crushing them with the back of a wooden spoon as you go. add the pork back in with any juices that accumulated on the plate.
  • cover your pot and put in the preheated oven. let the sauce cook until the pork is falling-apart tender, sauce is thickened and flavors have melded, about 2 hours.
  • remove the bay leaves and using 2 forks, break up all the pork and stir it together to created the ragu. check for seasoning and enjoy with pasta or polenta.
  • left overs can be cooled and kept in a glass container in the fridge for 5 days or frozen in plastic for 6 months.6D1D6185-F37C-43A3-93AC-9D22152DBD56FBDF64A0-0EBF-443A-8784-BFB06F90A948A36A0493-5628-4514-94FC-A9AEC3E6FEBA42E8C560-10CC-4582-82DA-C083582511B1CF816A5E-BE79-422B-9D16-2C6E8AB307D740FC70A5-3CB0-41D6-B435-190A0D549710
Posted in italian, meat dishes, pork, sauces, Uncategorized | Leave a comment

parmesan broth

IMG_0606

if you’re anything like me, you probably have a bag of parmesan rinds in your freezer that you’ve been saving for something special. as a culture of foodie freaks, we’ve been taught never to throw the rinds away! and yes, you can use them to flavor a soup or toss them in your red sauce for some extra zip, but parmesan broth is a much better way to use these beauties. it’s simple to make and you can use it so many different ways. in this post, i’m using it in its purest form and simply serving it over some blanched baby vegetables, but let your imagination take over and think of all the ways a parmesan infused broth might make your dishes better. you can use it as the liquid in risotto or a base for soup. you can even cook your favorite pasta in it! after you see how easy it is to make, those parmesan rinds will never look the same to you again.

parmesan broth (makes about 4 cups)

  • 2 tablespoons olive oil
  • 1 onion, chopped
  • 10 cloves garlic, peeled
  • 1 bunch thyme
  • 2 bay leaves
  • 4 sprigs parsley
  • 1 teaspoon black peppercorns
  • 1 cup dry white wine
  • 1 lb parmesan rinds
  • 2 quarts water

IMG_0579IMG_0589

Heat oil in a large saucepan over medium-high heat. Cook onion, garlic, thyme, bay leaf, parsley, and peppercorns, stirring often, until garlic is slightly brown, about 5 minutes. Add wine, bring to a simmer, and cook, scraping up any brown bits, until liquid is reduced by half, about 4 minutes. Add Parmesan rinds and water; bring to a boil. Reduce heat and simmer, stirring occasionally to prevent cheese from sticking to bottom of pot, until broth is flavorful and reduced by half, about 2 hours. Strain through a fine-mesh sieve into a large bowl (or an airtight container if making ahead) and check for seasoning, adding a little salt if necessary.

IMG_0590IMG_0594

i blanched my baby vegetables in salted water for just a few minutes each, starting with the white turnips and ending with the golden beets. this is a wonderful alternative to a salad on chilly nights and you can’t beat the visual punch! as summer rolls in, you can use whatever vegetables are coming up in your garden, like little cherry tomatoes cut in half or zucchini delicately cubed. say hello to your new favorite culinary trick.

Posted in appetizers, cheese, recipes, soups | Tagged , , , | 1 Comment

ricotta gnocchi

after taking much of the summer off, i’m back to cooking and blogging! i meant to make a grand entrance in early fall and wow you with all my fabulous autumnal recipes, but soon realized that i had a stack of tested recipes with no pictures to accompany them. i don’t know about you, but nothing bugs me more than reading about cooking and food with no pictures to look at. i love you all too much to have put you through that torture, so i am slowly working through my stack of culinary gems and snapping away as i cook.

fall is not only my favorite season because i can finally wear my boots and scarves again… i also love that the cool crisp air and bulky sweaters allow me to eat pasta  and stews with reckless abandon! waistline, shmaistline! and when i think about fall pastas, gnocchi is the first one that springs to mind. it slowly shows up on the menus of our favorite restaurants in all its glorious forms, but making it at home can be a bit daunting for the home cook. traditional potato gnocchi, with all of its steps and temperamental ways, can trip up even the most seasoned chef. my ricotta gnocchi recipe is just the thing you need to look like a pro without breaking a sweat.

ricotta gnocchi (makes 4 servings)

1 16-ounce container whole milk ricotta
1 egg
1/2 cup parmesan, finely grated
1/2 teaspoon salt
1/4 teaspoon nutmeg, freshly grated
1 tablespoon italian parsley, finely chopped
1 cup flour, you may need a bit more or less

set a strainer lined with a couple layers of cheese cloth over a bowl and strain the ricotta for an hour in the fridge or over-night.
using a wooden spoon, mix the strained ricotta, egg, cheese, salt, nutmeg and parsley in a large bowl. mix in half the flour and slowly add the other half until the dough comes together. it should be sticky but not cling to your fingers. let the dough rest in the refrigerator for 30 minutes. line a large baking sheet with a silpat or parchment paper. (make sure the baking sheet fits in your freezer)
on a floured cutting board, roll about a fourth of the dough into a thick rope, around 3/4-inch thick.
Using a sharp knife, cut the log into 3/4″ pieces. roll each gnocchi on the back of a fork with your thumb using gentle pressure and transfer them to the baking sheet. repeat with the rest of the dough and then transfer the baking sheet to the freezer. freeze until each gnocchi is individually frozen*. at this point you can put the gnocchi into a freezer bag and cook later (they will keep for about 1 month) or drop them into a large pot of boiling salted water and boil until they float to the the top. strain the gnocchi and add them directly to whatever sauce you plan to use**.

*i have found that freezing the gnocchi first produces a much better little dumpling and they never fall apart.
**i used marinara for my gnocchi, but a simple butter and sage sauce works great too.

Posted in cheese, pasta, recipes | 3 Comments

fantastic favas

getting a farm box every week has proved to be both wonderful and a tad arduous. wonderful for all the inspiration it has given me and arduous, since all your produce comes at once and needs to be washed and dealt with in some way. i’ve gotten used to just blocking out a 1/2 hour and washing and trimming everything at once so it’s all ready to go for a week of cooking. a little hassle for a big payback in my opinion. but then came the fava beans! holy mackerel are these little guys a pain in the butt! first you have to shuck them out of their big, green, fuzzy pods, and then you have to blanch them to remove their outer shell. is all of this work worth it? hell yes! boy are these guys good, and super good for you. i’ve become a little bit of a fava addict these days. i hope these tips make you one as well!

1. remove the fava beans from their outer pod. (once this step is done you can put them in a ziplock bag and store them in the fridge until your ready to use them, about 5 days)

2. blanch the beans in boiling water for 1 minute, drain immediately and rinse with cold water to stop them from cooking.

3. gently peel away the outer shell to reveal the bright green tender bean. (once this step is done you can use them right away or store them in an airtight container, about 3 days)

at this point, these little beauties are ready to be tossed in a salad and eaten just as they are. or, try adding them to a simple veggie roast or an orzotto (orzo in the style of risotto) like i did for a fabulous side dish or lunch.

for this orzotto, i followed my recipe and added cubes of fresh mozzerella and the favas.

Posted in recipes, side dishes, Uncategorized, vegetables | Tagged , , , | 1 Comment

bi bim bop… done my way

i am a huge fan of rice bowls in all varieties. italian risotto, chinese fried rice, mexican rice and beans… but my all time favorite is the korean version bi bim bop! i love how it looks when it’s first set down in front of you. there are so many “first bite” possibilities! you can mix it all up and use the egg yolk as a sauce or keep things separate and create all kinds of different combos.  my way is obviously not a classic korean bowl, but it was delicious and simple to prepare. this is how i did it…

bi bim bop (makes 4 servings)

1 lb short ribs, cut off the bone and marinated in korean bbq sauce for 4 hours or overnight
1 english cucumber, julliened
1 carrot, julliened
1/2 lb medium shrimp, peeled and deveined
2 handfuls of fancy greens, i used italian parsley
2 cups of white rice, cooked
4 egg yolks
2 tablespoons kosher salt
2 tablespoons sugar
1 cup rice vinegar
soy sauce and chili sauce for dipping

mix together salt, sugar and rice vinegar. add the carrot and cucumber and let the veggies pickle while you’re making everything else. grill the short ribs for 4 to 5 minutes on each side and then set aside to rest. toss the shrimp in olive oil and salt and pepper and roast in one layer on a cookie sheet in a 400 degree oven for 10 minutes. dress your greens in a little oil, lemon juice and salt and pepper.
now put everything together over rice in large bowls making sure to drain your pickles and slice your short ribs. serve with soy and chili sauce on the side and a beautiful egg yolk right on top. (you can fry your eggs if you don’t want to serve raw yolks)

this dish is a blank canvas for any cook. you can use any kind of meat or vegetable that you like and by serving the sauces on the side, your guests can personalize their heat level. don’t shy away from pickling your veggies though. it really adds so much flavor and depth to this meal. happy experimenting!


Posted in beef, meat dishes, recipes | Tagged , , , , | 2 Comments

asian short ribs


in an effort to become a better person, and more responsible meat eater, i’ve made some changes in my weekly grocery shopping routine. instead of doing a “one-stop” trip to trader joe’s for all our weekly essentials and then a whole foods “drive-by” for some specialty items and meat, i’ve signed up for a weekly produce delivery from full circle farm. they have an amazing sustainably raised meat program as well as dairy and eggs, all of which are organic and locally produced with not a factory in sight! i am a firm believer in the food chain, but factory farms are killing our environment and producing low quality food. i can no longer participate in their existence so buying meat and produce just got a little pricier in my household. but, just like at large grocery chains, there are some cuts of meat that are always a bit cheaper because they need a little more skill, finesse, or patience to prepare. don’t fear dear readers. i have some great recipes that highlight these gems of meaty goodness and really make them shine. short ribs were on special this week so let’s get cooking!

sticky sweet asian short ribs (serves 4)

1/4 cup soy sauce
1/4 cup rice wine vinegar
1/4 cup mirin (sweet rice wine)
1 teaspoon ground ginger
6 garlic cloves, peeled
1/2 teaspoon red pepper flakes
1/2 cup brown sugar
the zest and juice of one orange
1/4 cup hoisin sauce
3 lbs short ribs
water to cover
1 tablespoon fresh scallions, chopped fine
preheat oven to 300 degrees.
in a large bowl or measuring cup, whisk together the first 9 ingredients. pour over the short ribs in a large dutch oven and add enough water just to cover. cover the pot and simmer in the oven for 3 hours, until the short ribs are tender and separate easily from their bones.
remove the ribs to a plate and discard bones. pour the braising liquid in a fat separator. return the liquid, sans fat, back to the pot and cook over a high flame until it’s reduced to a thick syrupy glaze, about 10 minutes. add the ribs back to the pot to coat in the glaze. sprinkle with the chopped scallions and serve over rice. enjoy!
short ribs can be cooked so many different ways, but this is definitely my family’s favorite. i love that i can stick them in the oven and forget about them for a few hours too. the leftovers make awesome asian tacos… just shred the meat and serve with julienned carrots and napa cabbage in moo shu wraps!

Posted in beef, meat dishes, recipes | Tagged , , , , , | Leave a comment